A new year, new challenge!


A new year, new challenge!
Starting from June I have started to take Azure examination from Fundamentals, Associate and finally I have successfully achieved my Azure Solutions Architect Expert certification!
These are the examination path I took –
1. Microsoft Certified: Azure Fundamentals (AZ-900)
2. Microsoft Certified: Azure Administrator Associate (AZ-104)
3. Microsoft Certified: Azure Security Engineer Associate (AZ-500)
4. Microsoft Azure Architect Technologies (AZ-300) + Microsoft Azure Architect Design (AZ-301) = Microsoft Certified: Azure Solutions Architect Expert
Microsoft have their certifications aligned in three levels:
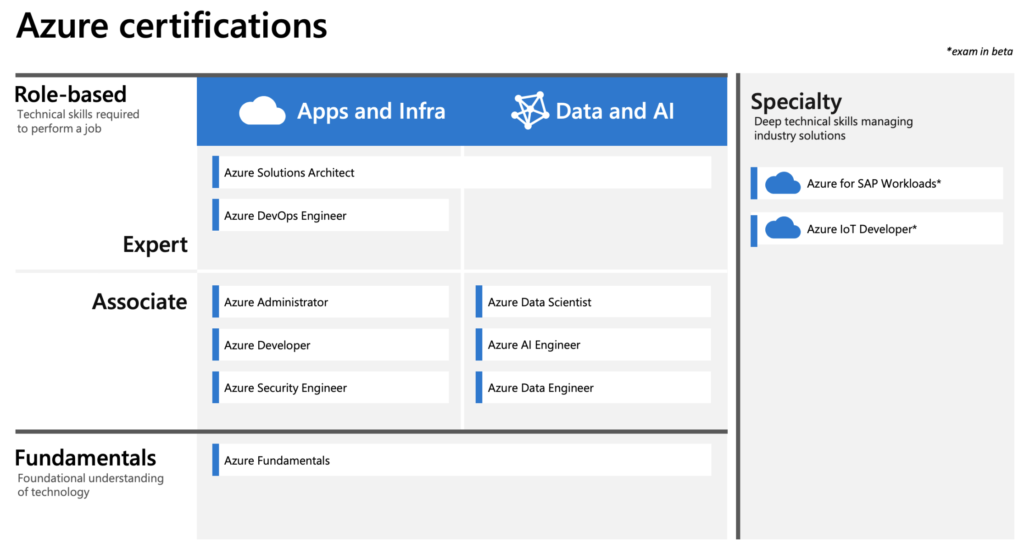
As you can see, if you are aiming to obtain an Expert certification, it’s highly recommended that you have had significant Azure experience. This can be demonstrated by obtaining the Associate level exam, however, it’s not a prerequisite to obtain an Associate exam prior to taking the Azure Solutions Architect Expert exams. For sure, without exposure to Azure, this will be a difficult certification to achieve.
The log archive size of the network devices are increasing every year due to heavy data traffic. Even though we may only keep for one year retention for this kind of log, capacity planning is a must on every year to ensure the log storage will not getting exhausted.
1) In the FortiAnalyzer/FortiManager CLI, run the following command to check if the logical volume manager (LVM) is enabled:
#execute lvm start
2) Provision the disk on the VM
Continue readingBoth mailbox creation and deletion failure scenarios heavily involve verifying the current recipient type values across all directories – especially in a directory synchronized environment. For example; if a user is listed on-prem as a remote mailbox with a cloud archive, then you should expect EXO to have a primary and an archive mailbox for this user. If it doesn’t, then troubleshoot for a synchronization failure somewhere between on-prem and EXO.
The three attributes you will be dealing with are the following, and there are many possible values for each:
Details